Main layout block includes everything that is located between the header and the footer of the page. Main layout block is presented by <main></main> tag in the page code.
When building a homepage, the creation of a main layout block is not required: the page content does not have any additional elements between the header and the footer. You can use the default template.
But in case of a blog or portfolio post some additional elements except header and footer are needed (e.g. sidebar or titlebar, breadcrumbs). In this case, the creation of the main layout block is required.
Ноw to create a main layout block
Before creating a main layout block, enable the page builder for the template_post post type
How to enable page builder for custom post types
You can import pre-made blocks from demo data or create them manually.
- Navigate to KSF SmartKit > Content blocks tab in your WordPress admin sidebar and click Add new content block.
- Enter the block title (e.g. “Blog article layout”) into the title field.
- Add a content to your content block using WPBakery Page Builder (see more on how to use the page builder here).
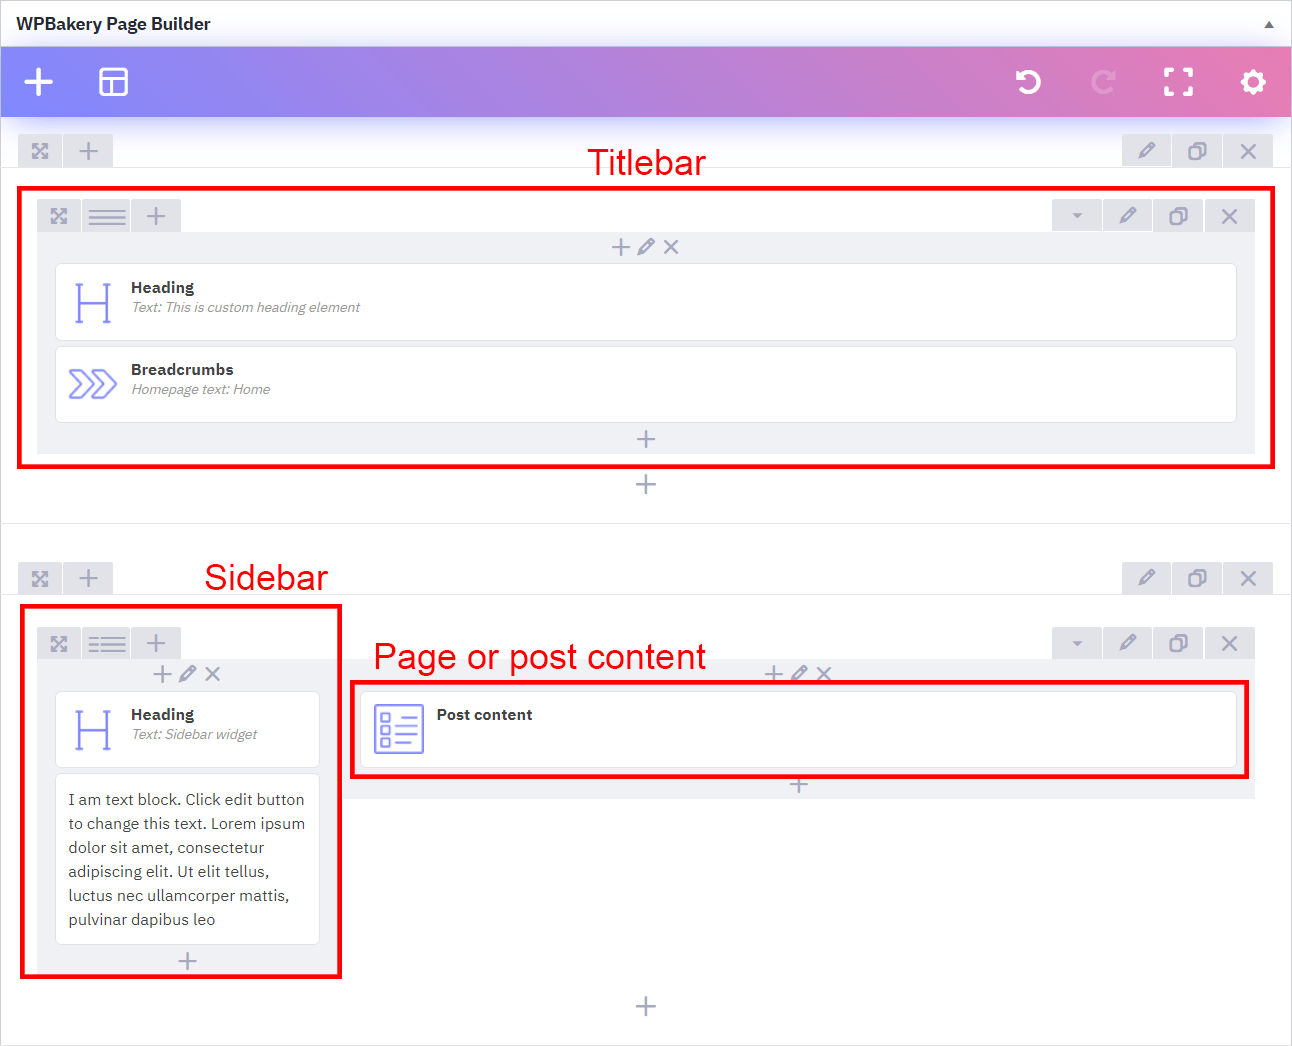
Typically, a main layout block contains a page content with page title, breadcrumbs navigation and sidebar. Wrappers can be used for styling. - Click on the Publish button.
Creating a layout
Adding a titlebar section
- Click Add Element button in the WPBakery Page Builder frame.
- Search for Section in the add element pop-up window and click on it to add it to the page. When you add Section element, the Row element is added automatically.
- Click on the Pencil icon in the right top corner of Row element or in the right top corner of Section element to show the settings window of these components.
Adding a sidebar section
- Create the second section the same way.
- Choose the row layout by clicking on the Three horizontal lines icon in the left top corner of the Row element. Commonly the width of the sidebar is 20%, 1/4 or 1/3. Sidebar can be located on the left or on the right.
- Set the gap between the columns in Columns tab in Row’s settings window. Usually it is Large or Custom gap value.
- Click on the + button inside the column, into which you want to add the post content.
- In the Add Element pop-up window, search for Post content and click on it to be added into the column.
- In order to adjust sidebar responsibility click on the Pencil icon on the column top.
- Click to the Save changes button.
Adding a post title
- Click on the + button in the column, into which you want to add the post title.
- Search for Heading in the add element pop-up window and click on it to add it.
- Choose H1 in Element tag dropdown and Post/page, Archive, Search or 404 title in Text source dropdown.
- Set other options in settings window, if necessary and save changes.
Adding a breadcrumb navigation
You can add a breadcrumb navigation for the better usability.
- Click on the + button in the column, into which you want to add a breadcrumbs.
- Search for Breadcrumbs in the add element pop-up window and click on it to add it.
- Set options in settings window, if necessary and save changes.
Adding a sidebar navigation
Create a menu in WordPress by visiting Appearance > Menus in your WordPress admin area.
Provide a name for your menu, e.g. “Sidebar navigation” and then click on the Create menu button.
Menus in SmartKit are created the same way as in WordPress.
- Click on the + button in the sidebar column.
- Search for Vertical menu in the add element pop-up window and click on it to add it.
- Choose “Sidebar navigation” from the menu list and set other options in settings window.
- Click to the Save changes button.
Ноw to apply the main layout block to specific pages
To apply new main layout block to specific pages or posts layout, see Layout settings section.