How to create a site footer
Before creating a site footer, enable the page builder for the footer_post post type
How to enable page builder for custom post types
You can import pre-made footers from demo data or create them manually.
- Navigate to KSF SmartKit > Footers tab in your WordPress admin sidebar and click Add new footer.
- Enter the footer title (e.g. “My site footer”) into the title field.
- Add a content to your footer using WPBakery Page Builder (see more on how to use the page builder here).
- Click on the Publish button.
Creating a footer layout
- Click Add Element button in the WPBakery Page Builder frame .
- Search for Section in the add element pop-up window and click on it to add it. When you add Section element, the Row element is added automatically.
- Choose the row layout by clicking on the Three horizontal lines icon in the left top corner of the Row element. Common layout is three or four equal columns.
- Click on the Pencil icon in the right top corner of Row element or in the right top corner of Section element to show the settings window of these components.
Create the copyright section the same way, if necessary.
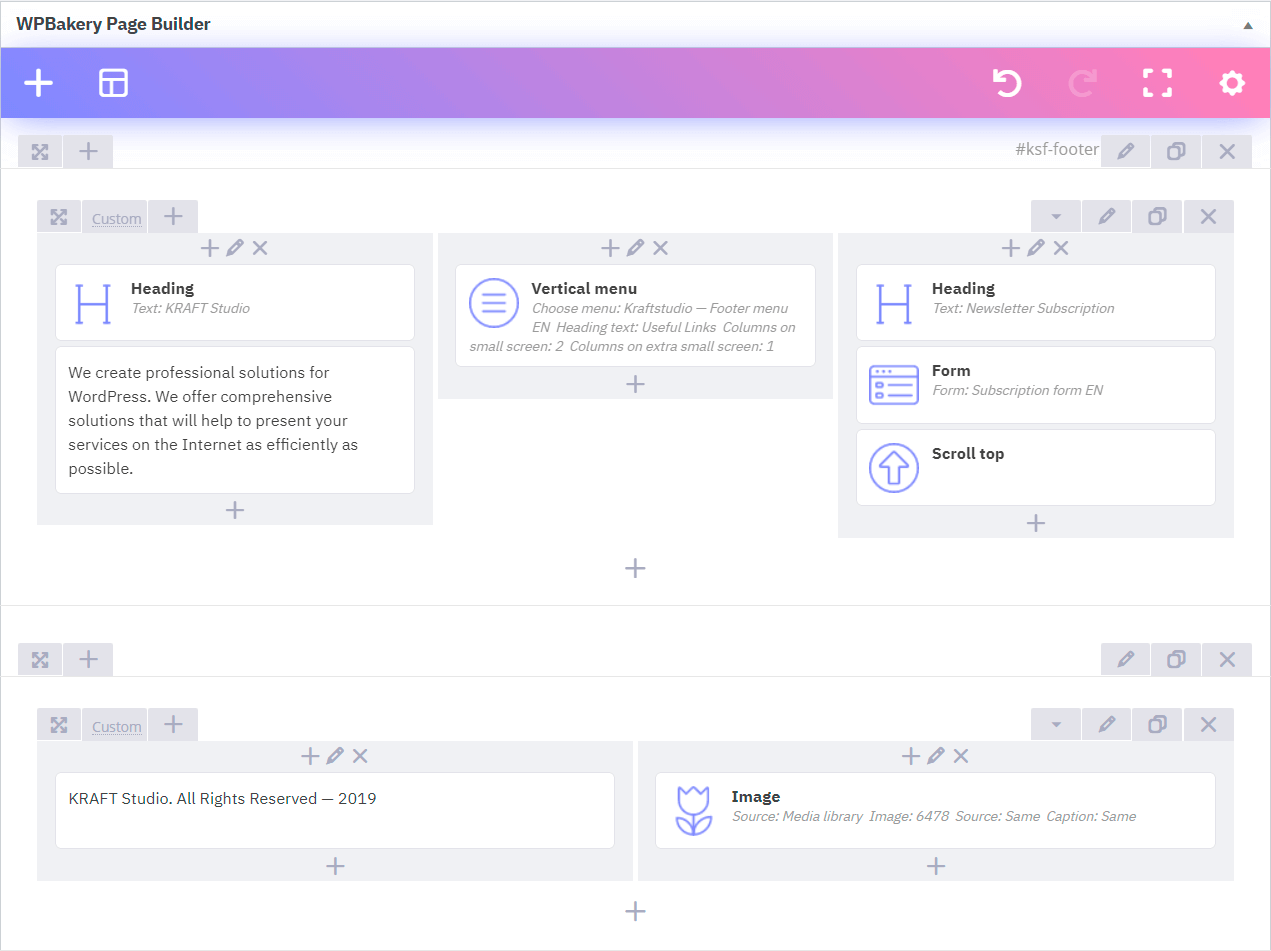
Adding a footer menu
Create a menu in WordPress by visiting Appearance > Menus in your WordPress admin area.
Provide a name for your menu, e.g. “Footer menu” and then click on the Create menu button.
Menus in SmartKit are created the same way as in WordPress.
- Click on the + button inside the column, into which you want to add the menu.
- Search for Vertical menu in the add element pop-up window and click on it to add it to the footer.
- Choose “Footer menu” from the menu list and set other options in settings window.
- Click on the Save changes button.
Adding a social links
Create social icons to add direct links to your own social network profiles.
- Click on the + button inside the column, into which you want to add the social links.
- Search for Icon in the add element pop-up window and click on it to add it into the column.
- Choose an Icon (e.g. facebook icon), enable Add link and enter The link url in settings window.
- Go to Box model tab in the settings window and set Margin bottom to 0 and Margin right to Medium.
- Set other options in the window and save changes.
- Add more icons to the column the same way.
Adding “To top” button
- Click on the + button in the WPBakery Page Builder frame.
- Search for Scroll Top in the add element pop-up window and click on it to add it.
- Choose Size, Icon and adjust other style options in the settings window.
- Save changes.
How to apply the footer to specific pages
To apply new footer to specific pages or posts layout, see Layout settings section.