The theme has built-in capabilities for creating forms. You can create forms using WPBakery Page Builder.
WPBakery Page Builder provides maximum flexibility when creating forms for feedback, subscribing, login/registration/password recovery.
How to create a form
Before creating a form, enable the page builder for the form_post post type
How to enable page builder for custom post types
You can import pre-made forms from demo data or create them manually.
- Navigate to KSF SmartKit > Forms tab in your WordPress admin sidebar and click Add new form.
- Enter the form title (e.g. “My new form”) into the title field.
- Add a form elements and other content to your form using WPBakery Page Builder (see more on how to use the page builder here).
- Click on the Publish button.
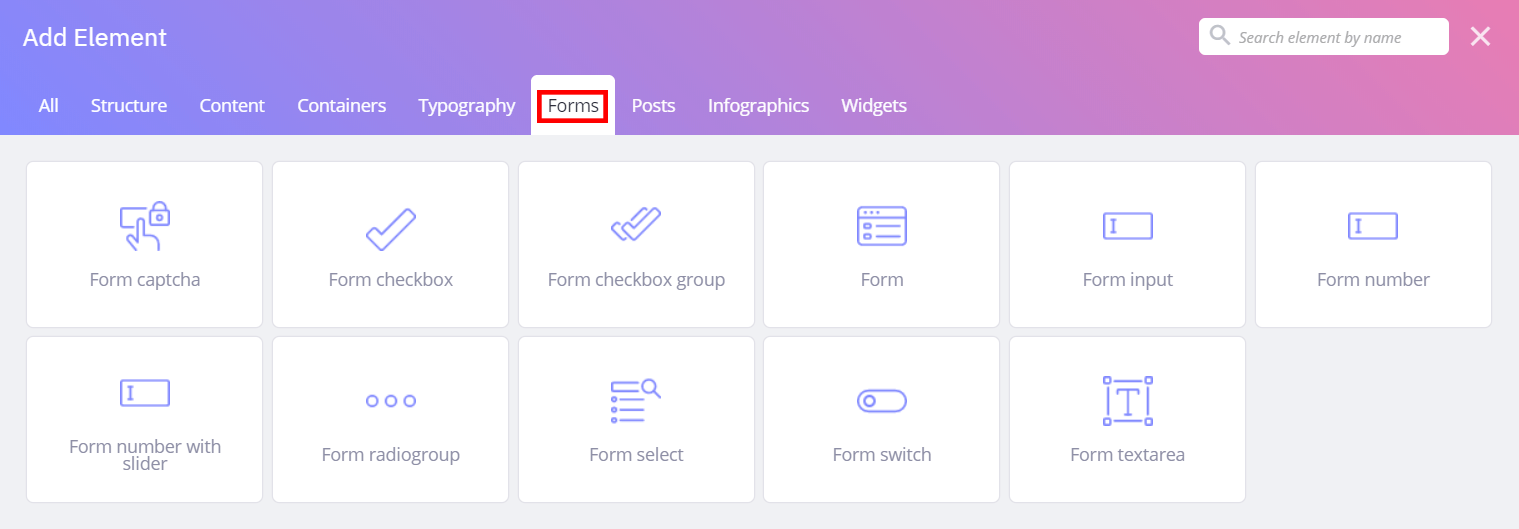
How to add form elements (fields)
- Click on the + button in the column, into which you want to add the form element.
- Go to Forms tab and search for necessary element in the add element pop-up window and click on it to add it to the form.
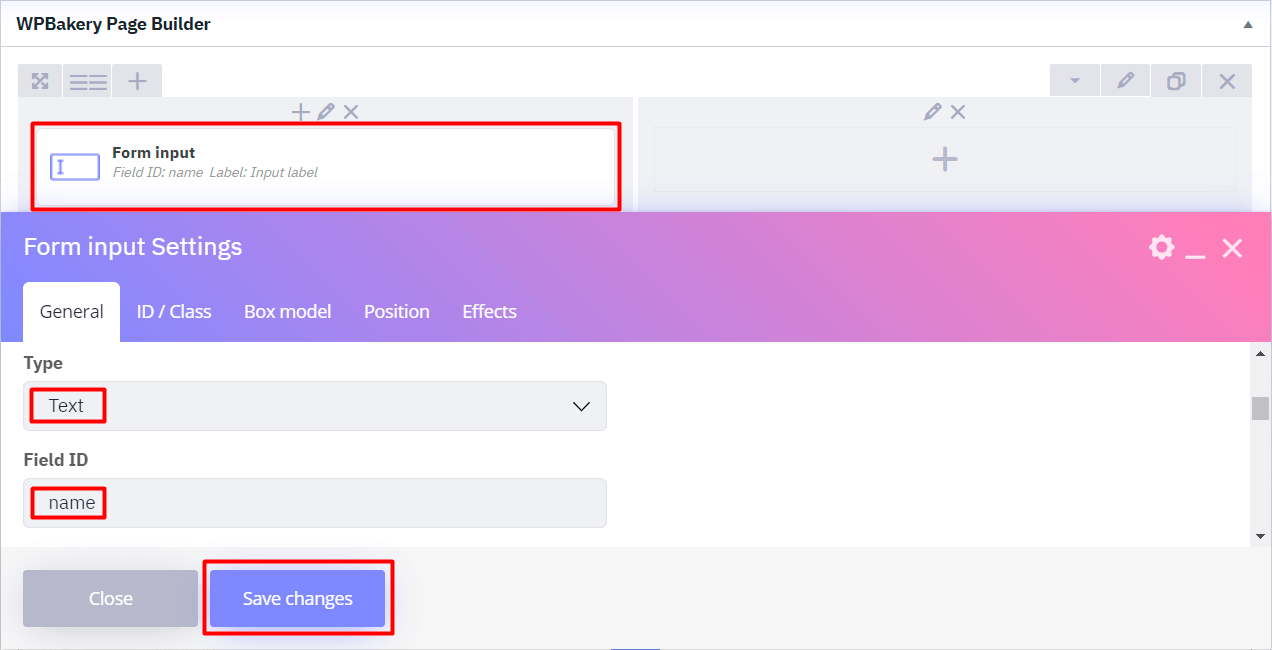
- Set ID, slyle and validation options in In the element’s settings window.
- Save changes.
Use “a-z” and underscore “_” characters in ID field.
Using captcha
In order to protect your site against spam and other types of automated abuse, add a Captcha element to your form.
SmartKit captcha field based on Google reCAPTCHA service.
To start using reCAPTCHA, you need to sign up in your Google account and generate an API key pair for your site.
You can find full guide here.
Navigate to SmartKit > Theme options > Integrations, set API key pair and save theme settings.
How to configure the form
Open Screen options and activate Form settings in the form editing screen.
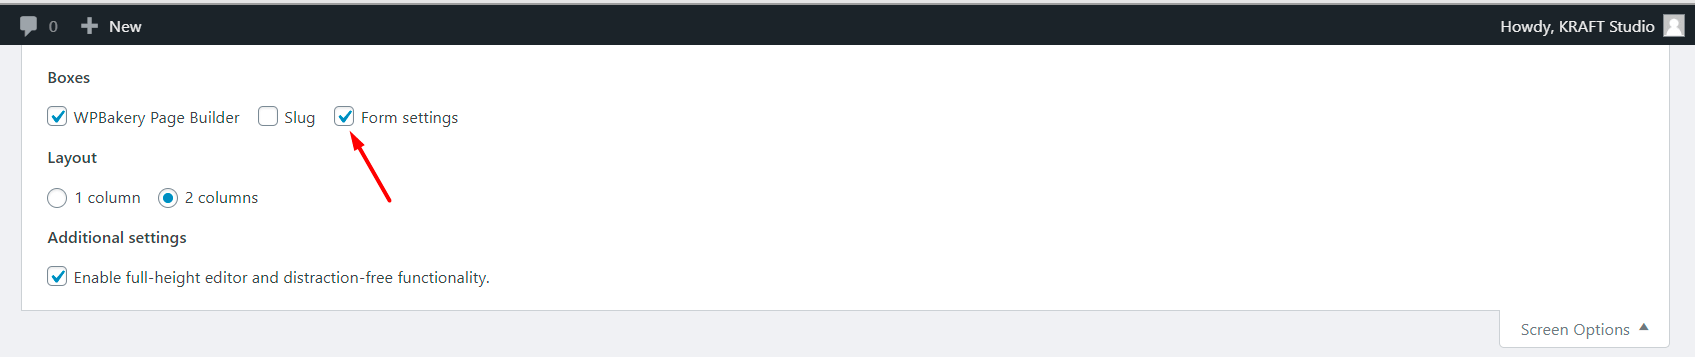
Scroll down and configure Form settings in metabox.
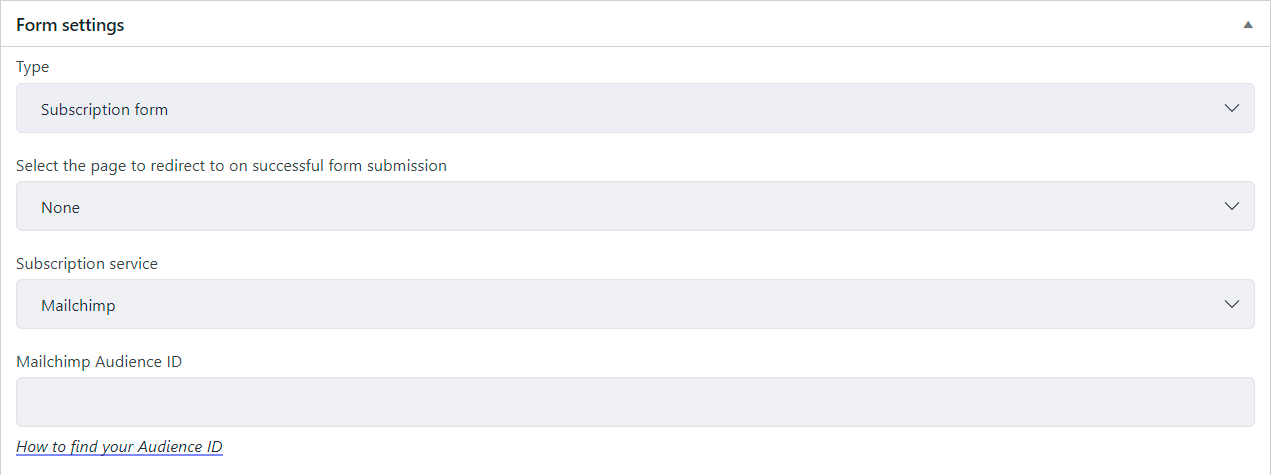
Select the form type. There are 5 form types:
- Contact form
- Login form
- Registration form
- Lost password form
- Subscription form
You can adjust form messages and choose a page to redirect to if neccessary.
The configuration features of various types of forms are described below.
Contact Form
Data from the form can be sent to the specified email or saved in the site database.
Required form settings: Email and Email template.
Save submitted form to database option allows to save formdata in database.
In order to manage form entries, navigate to KSF SmartKit > Forms entries.
Field set example
| Field | Element | Type | ID | Required |
| Name | Form input | Text | “name” | + |
| Form input | + | |||
| Subject | Form input | Text | “subject” | + |
| Message | Form textarea | “message” | + | |
| Submit | Button | Form submit |
Email template example
Email from [site_url]
[form_title]
Name: [name]
Email: [email]
Subject: [subject]
Message: [message]
Login form
You can create any login form using the form editor and replace the standard wordpress form.
Required field set
| Field | Element | Type | ID | Required |
| Username | Form input | Login | + | |
| Password | Form input | Password | + | |
| Remember me | Form checkbox | “remember” | ||
| Submit | Button | Form submit |
Registration form
You can create any registration form using the form editor and replace the standard wordpress form.
Required field set
| Field | Element | Type | Required |
| Username | Form input | Login | + |
| Password | Form input | Password | + |
| Repeat password | Form input | Repeat | + |
| Submit | Button | Form submit |
Lost password form
You can create any lost password form using the form editor and replace the standard wordpress form.
Required field set
| Field | Element | Type | Required |
| Username | Form input | Login | + |
| Submit | Button | Form submit |
Subscription Form
Subscription form has integration with the MailChimp service.
Navigate to SmartKit > Theme options > Integrations, set MailChimp API key and save theme settings.
Required field set
| Field | Element | Type | Required |
| Form input | + | ||
| Submit | Button | Form submit |
In order to integrate current form with Mailcimp, set Mailchimp Audience ID.
How to find your Audience ID
Custom field IDs must match field IDs in Mailchimp.
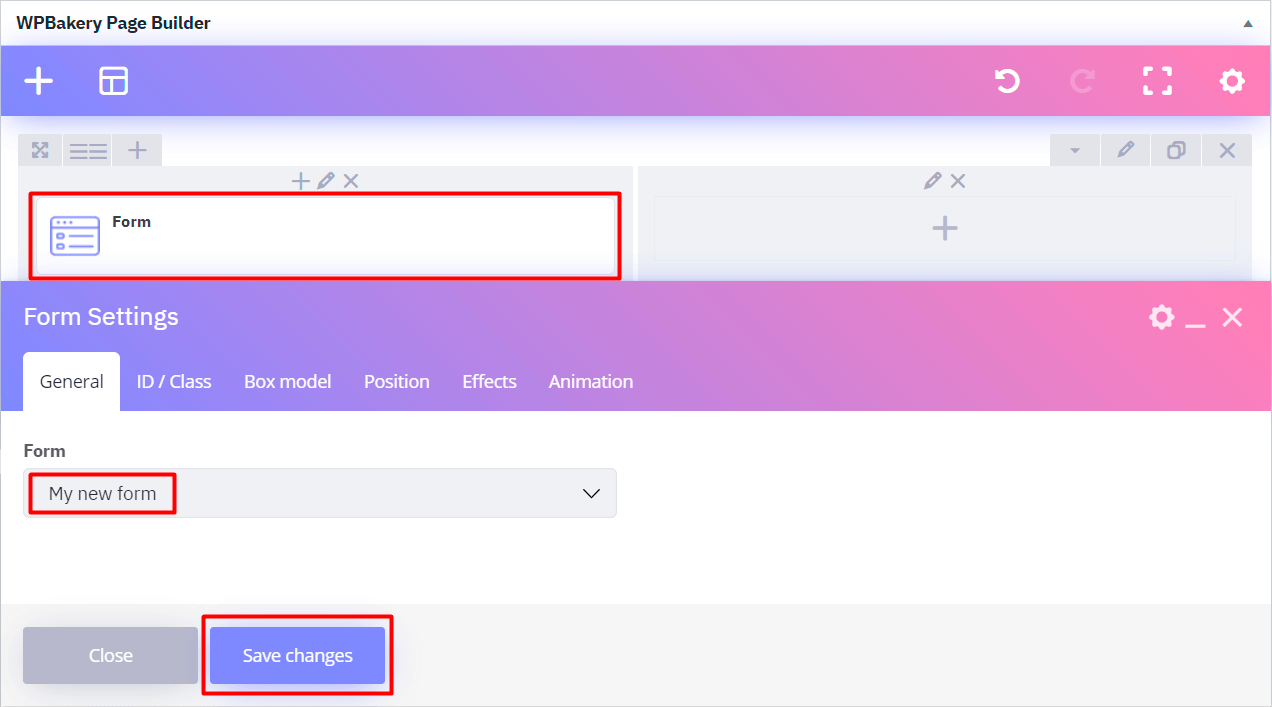
How to add the form to the page
- Navigate to the editing screen, where you want to add the form. It can be specific page or site header or footer.
- Click on the + button in the WPBakery Page Builder frame.
- Search for Form in the add element pop-up window and click on it to add it.
- Choose form name (“My new form”) from the list.
- Click on the Save changes button.
Done. Now your form has been added.
You can also add the form via shortcode same way as content blocks.
After that navigate to KSF SmartKit > Theme options > Integration > Login/Register pages and set login and registration pages.