The theme has built-in capabilities for creating highly customizable post grids.
You can generate beautiful grid for your blog post, product showcase, team member showcase, portfolio, gallery, archive post display, category post display, tags post display, custom taxonomy and terms post. All of this can be displayed via Post grid component.
You can also display all this as a carousel.
How to create a post grid/carousel
All the post grid items have the same layout.
With SmartKit theme you can create grid layout using WPBakery Page Builder with maximum flexibility.
How to create grid layout
Before creating a grid layout, enable the page builder for the grid_post post type
How to enable page builder for custom post types
You can import pre-made grid layouts from demo data or create them manually.
- Navigate to KSF SmartKit > Grid layouts tab in your WordPress admin sidebar and click Add new grid layout.
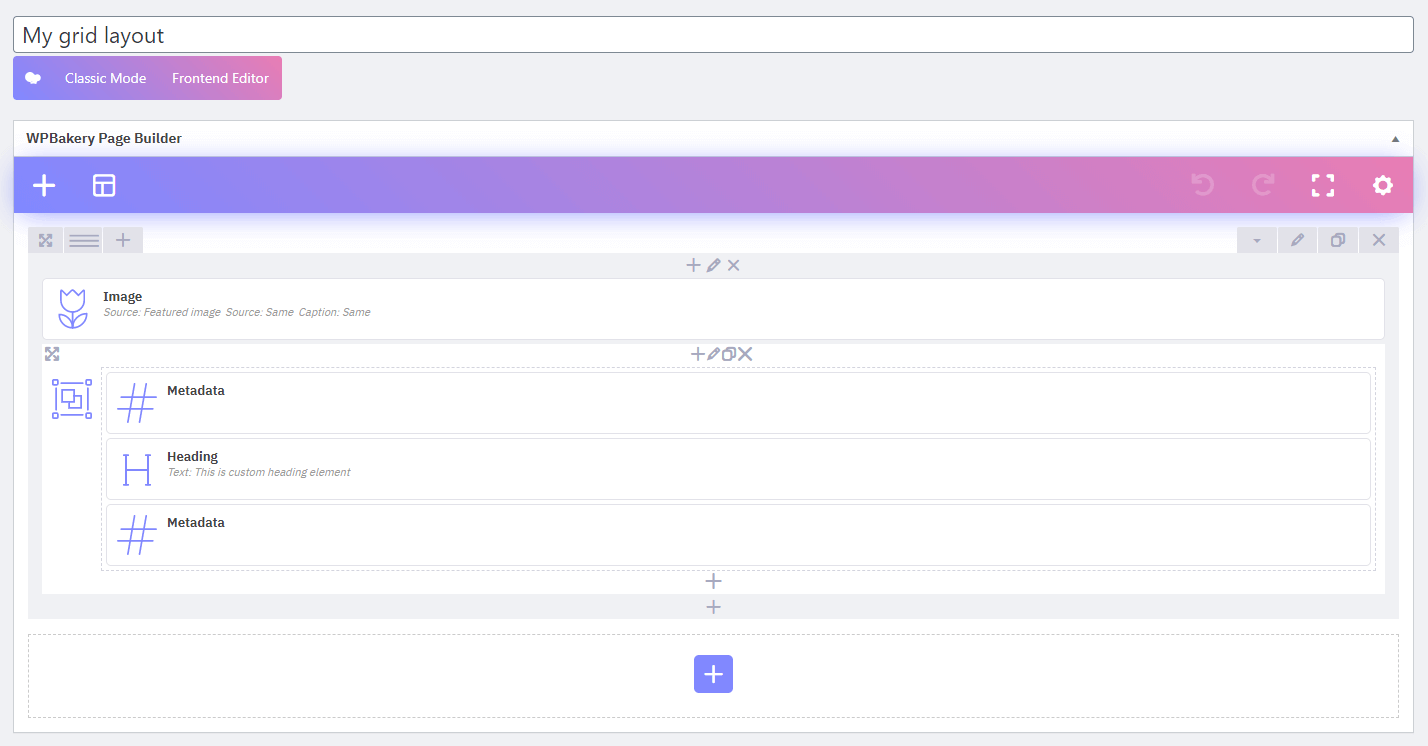
- Enter the slide title (e.g. “My grid layout”) into the title field.
- Add a content to your grid layout using WPBakery Page Builder (see more on how to use the page builder here).
Typically, a grid layout contains a featured image, post title, and metadata elements: category, tag, author, post views counter etc. - Click on the Publish button.
Adding featured image
Post grid items usually have images. To set the featured image, navigate to the post editing screen and go to Featured Image metabox in the right sidebar.
- Click on the + button in the WPBakery Page Builder frame.
- Search for Image in the add element pop-up window and click on it to add it to the grid layout.
- Set Featured image in Source dropdown. Set Image size and Aspect ratio.
- Activate Custom width, set Width to 100%. Set Object fit to Cover and Shape to Squared.
- Set On click action to Open post link and Hover effect if necessary.
- Go to Box model tab in settings window and set Margin bottom to 0.
- Click on the Save changes button.
For best performance, the image size should be equal to or slightly larger than the size of the occupied area in the grid item.
You can create unlimited custom image sizes using Simple Image Sizes plugin or similar.
Adding post title
- Click on the + button inside the column, into which you want to add the menu.
- Search for Heading in the add element pop-up window and click on it to add it to the grid layout.
- Set Element tag to H3-H6 and Text source to Post grid article title.
- Set other options in settings window, if necessary.
- Click on the Save changes button.
Adding metadata
You can add groups of metadata elements: category, tag, author, post views counter etc.
- Click on the + button in the WPBakery Page Builder frame.
- Search for Metadata in the add element pop-up window and click on it to add it to the grid layout.
- Click to te + button in the settings window to add metadata elements. Choose a type of elements and an icons if necessary.
- Set other options in settings window.
- Click to the Save changes button.
How to show the post grid
- Navigate to the editing screen, where you want to show the post grid.
- Click on the + button in the WPBakery Page Builder frame.
- Search for Post grid in the add element pop-up window and click on it to add it.
- Choose grid layout name (“My grid layout”) from the list and adjust Pagination elements, Order and Item quantity.
- Filter the categoties in Filter by taxonomies tab if necessary.
- Go to Buttons settings tab and customize the buttons style.
- Click on the Save changes button.
In order to show custom post type grid (e.g. portfolio), choose required post type from the Post type list.

How to show the post carousel
You can show carousel with posts in the same way using Post grid component. Just choose Carousel in Type dropdown in the post grid settings window.